

The Green Hand-Press Machine Masterclass: Flawless Snap Installation Every Time
Cast-iron desktop press setup: M8 threaded top ram, 19mm bottom collar, and 4-piece snap set
If you have ever wrestled with hand pliers only to end up with crushed snap caps, crooked studs, or sore wrists after a batch of ten bags, the cast-iron Green Snap Button Press Machine is the single biggest upgrade you can make to your workshop bench.
Known across the haberdashery world simply as “The Green Machine,” this cast-iron hand press delivers balanced mechanical leverage. It turns high-friction metal snap and eyelet installation into a smooth, silent pull. Here is how to configure, calibrate, and operate yours with precision.
1. Machine Anatomy & Core Specs
Before installing your hardware, get familiar with the standard dimensions found on universal desktop presses:
- Upper Thread Mount: Standard M8 (8 mm screw thread). Your top dies always screw counter-clockwise into the descending ram.
- Lower Die Bushing: Unthreaded 19 mm smooth socket. Bottom dies simply drop into place and rest on the solid base.
- Throat Depth: Typically 70 mm to 90 mm, giving you clearance to reach deep into pockets, bag linings, and dog bandana wings.
- Base Flange: Features pre-drilled holes so you can bolt it directly to your cutting bench or mount it onto a heavy portable timber block.
2. Die Selection: Matching Dies to Snap Types
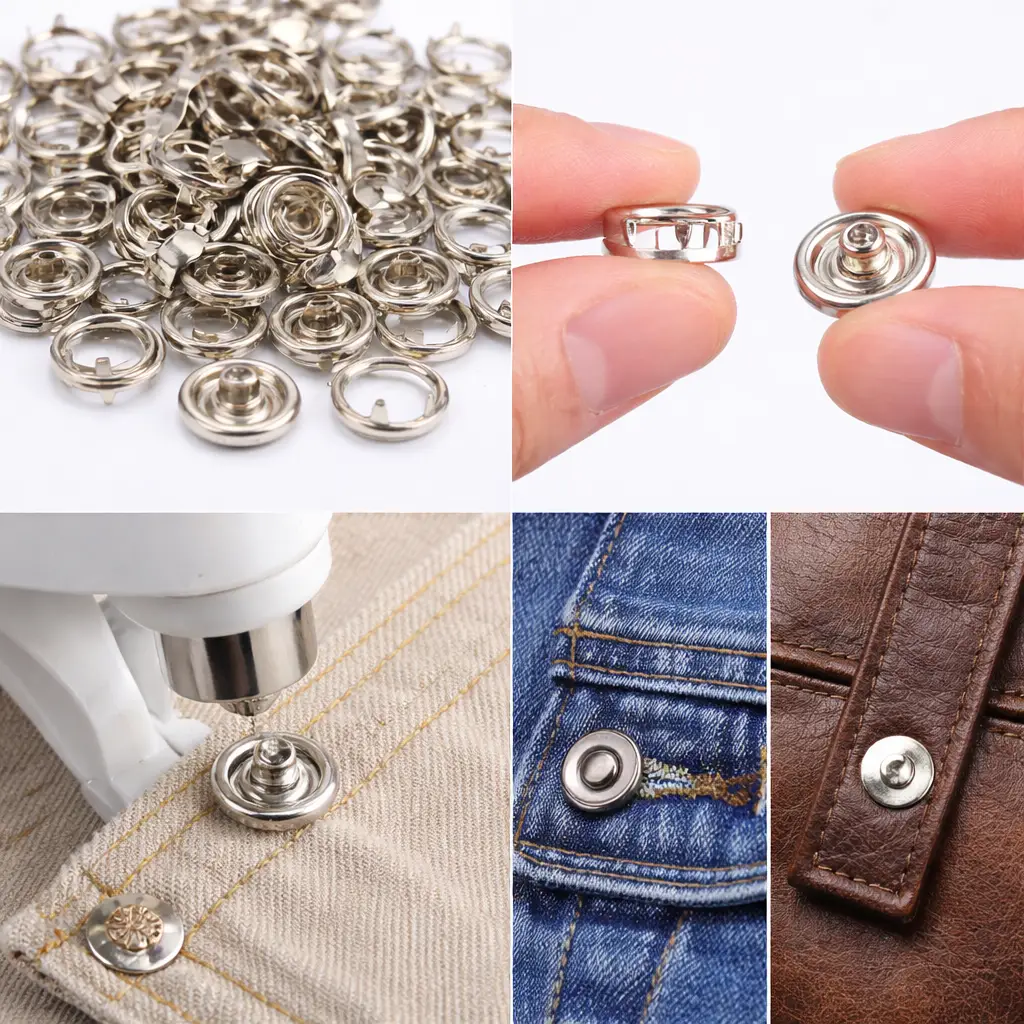
A snap button consists of four distinct components installed in two pairs. Never mix and match dies:
| Hardware Type | Top Die (M8 Screw) | Bottom Die (19 mm Drop-in) | Primary Use Cases |
|---|---|---|---|
| S-Spring Metal Snaps (VT-2 / 61) | Holds male stud or female socket securely | Smooth concave cup to seat the decorative cap | Jackets, heavy leather pouches, utility wear |
| Prong / Ring Snaps (Open Ring) | Ring seat with crimping ridge | Flat grooved anvil to curl pointed prongs | Baby clothes, lightweight knitwear, stretch apparel |
| KAM Plastic Resin (T3 / T5 / T8) | Shallow rubber-cushioned ram | Contoured flat disc to press the plastic center shank | Dog bandanas, diapers, waterproof PUL bags |
3. Step-by-Step: Installing Snap Fasteners
- Stabilize the Fabric First: Always iron a small square of woven interfacing behind thin cotton or linen. Snaps under tension will tear through unstabilized fibers over time.
- Pre-Punch the Pilot Hole: Use a rotary hole punch or an M8 hole-cutting die installed on your machine to punch a clean 2 mm to 3 mm pilot opening. Never push the metal shank through unpunched weave.
- Install the Female Half (Cap + Socket):
- Drop the concave cap die into the bottom 19 mm base.
- Screw the socket die into the top M8 ram until snug.
- Place the decorative outer cap into the bottom die with its post pointing up.
- Slide your fabric over the post (right side facing down).
- Seat the female socket over the post on the inside of the garment.
- Make the Press: Pull the long handle down smoothly in one fluid motion until you feel firm mechanical resistance. Do not yank or slam the lever; leverage does the crimping.
- Install the Male Half (Stud + Post):
- Switch to the stud die (top) and post die (bottom).
- Place the bottom post into the lower die, thread the fabric over it, snap the stud into place on top, and pull the handle down once more.
Workshop Calibration Tip: If the decorative cap shows a small ring dent on the outside after pressing, you are applying too much force or using a cap die that is half a millimeter too shallow. Ease lever pressure gradually.
4. Troubleshooting Common Press Errors
- The Snap Spins in Place: The fabric stack is too thin for the shank length. Add another layer of interfacing or an internal felt washer to take up the slack.
- Crushed or Deformed Socket: The top die was not screwed completely straight into the ram, causing uneven side-loading during compression.
- The Snap Pops Open Too Easily: S-spring sockets can be gently tightened by inserting a small flathead screwdriver into the spring channel and adjusting tension inwards.