

The Ultimate Guide to DIY Dog Bandanas: Fast Stitches, Pro Hardware & Snappy Finishes
Few sewing projects deliver instant gratification quite like a handmade dog bandana. Whether you want to coordinate holiday outfits, use up vibrant quilting cotton remnants, or craft boutique accessories for craft markets, a bandana is the ultimate quick-win make.
A bandana should look sharp, fit comfortably, and stay on through zoomies and park play. Using flimsy ties that knot into matted fur often leads to frayed edges.
Here is everything you need to stitch polished, durable dog bandanas—from pattern drafting and hardware selection to professional edge finishes with Theycraft.
1. Choosing the Right Bandana Architecture
Before cutting into fabric, decide how the accessory will attach to your pup. There are three primary styles, each tailored to different activity levels:
| Style | Attachment Method | Best For | Haberdashery Needed |
|---|---|---|---|
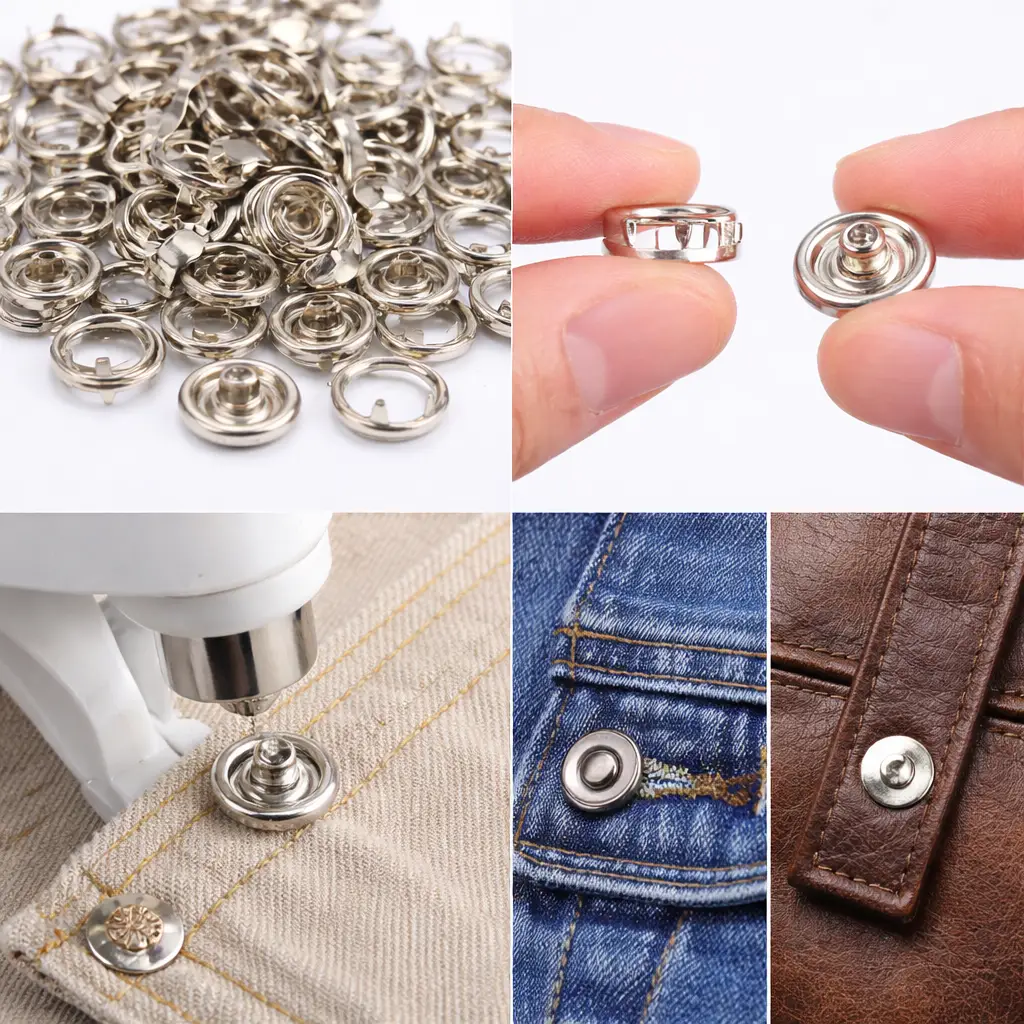
| Snap-On Bandana | Sits around the neck with hardware | Easy on/off, medium-to-large breeds | KAM plastic snaps or metal ring snaps |
| Over-the-Collar | Slides directly onto the dog’s existing collar | High-energy pups, escape artists | Medium-weight interfacing, bias tape |
| Tie-On Triangle | Classic double-fold knot | Quick photo ops, lightweight dogs | Woven cotton ribbons or twill ties |
The maker standard? Snap-on bandanas. They look clean, eliminate bulky neck knots that trap heat, and pop off safely if snagged during vigorous play.
2. Fast Pattern Drafting: Get the Dimensions Right
You do not need commercial patterns to draft a bandana. Measure the dog’s neck circumference snugly and calculate your cutting pattern using these baseline proportions:
- Neckband Span: Dog’s neck circumference + 10 cm to 12 cm (for ease, overlap, and snap placement).
- Drop Length (Peak Depth): Roughly half of the finished neck width. For a 40 cm neck, aim for a 20 cm drop from collar edge to bottom point.
- Seam Allowances: Keep them tight—use 6 mm to 10 mm to keep corners crisp and reduce inner bulk.
If you are batching multiple sizes (XS through XL) for an Etsy shop, sketch out master acrylic or cardstock templates to keep cutting swift and consistent.
3. Upgrading Closures: Snap Fasteners vs. Bulky Ties
Traditional tie bandanas frequently bunch up, twist sideways, or snag long fur. Setting dedicated snap fasteners produces a flat, tailored profile.
- Lightweight Pups (Cats, Chihuahuas, Puppies): Use smooth T5 plastic resin snaps. They are gentle on small frames, waterproof, and do not pull down delicate necklines.
- Active & Large Breeds (Retrievers, Bully Breeds, Shepherds): Upgrade to open-ring prong snaps or heavy-duty metal spring snaps. They grip firmly into reinforced cotton layers and withstand heavy shaking.
- Dual-Size Adjustability: Always install two female snap sockets spaced about 3 cm apart along the extension tab, paired with a single male stud on the opposite wing. This provides an adjustable closure that accommodates winter coats or dense seasonal shedding.
Workshop Tip: Always fuse a small 2 cm square of medium woven interfacing behind your snap placement area. Snapping and unsnapping exerts stress; the stabilizer prevents the hardware from tearing through thin cotton fibers over time.
4. Step-by-Step Construction: The Reversible Snap Bandana
- Cut Two Opposing Triangles: Pick two coordinating prints (e.g., autumn plaid on one side, spooky bats or bright polka dots on the other) for a fully reversible build.
- Reinforce the Wings: Iron interfacing squares onto the wrong side of both outer corners where the snaps will sit.
- Sew Perimeter: Place fabrics right sides together. Stitch around the edges using a straight stitch, leaving a 5 cm opening along one straight side for turning.
- Clip & Grade the Point: Trim seam allowances at the corners and clip the bottom triangle point close to the stitching line (without cutting the thread) to ensure a razor-sharp point when turned.
- Turn & Press: Turn the bandana right-side out, gently poke out the point with a point turner, and press flat with an iron.
- Topstitch All Around: Topstitch 3 mm from the edge around the entire perimeter. This secures the turning gap closed and gives the bandana structural stiffness.
- Press Your Hardware: Using a hand-press machine or snap pliers, punch and crimp your snaps onto the wing extensions.
5. Pro Touches: Elevating Boutique-Grade Dog Wear
If you want your pet accessories to stand out:
- Contrasting Edge Finishes: Replace standard topstitching by binding the entire perimeter with pre-folded bias tape in a vibrant pop color.
- Leash Ring Loops: Sew a small strip of folded cotton twill tape into the top neckline seam to hold a clip-on safety light or decorative pet charm.
- Fray-Proof Labels: Stitch your branded fabric ribbon labels flat into the side seam during step 3 for a polished, retail-ready presentation.